Introduction
Windows 内核漏洞利用的环境配置。
Prerequisites
- VMWare 或者 VirtualBox
- Windows7 x86 VM
Setting up VM
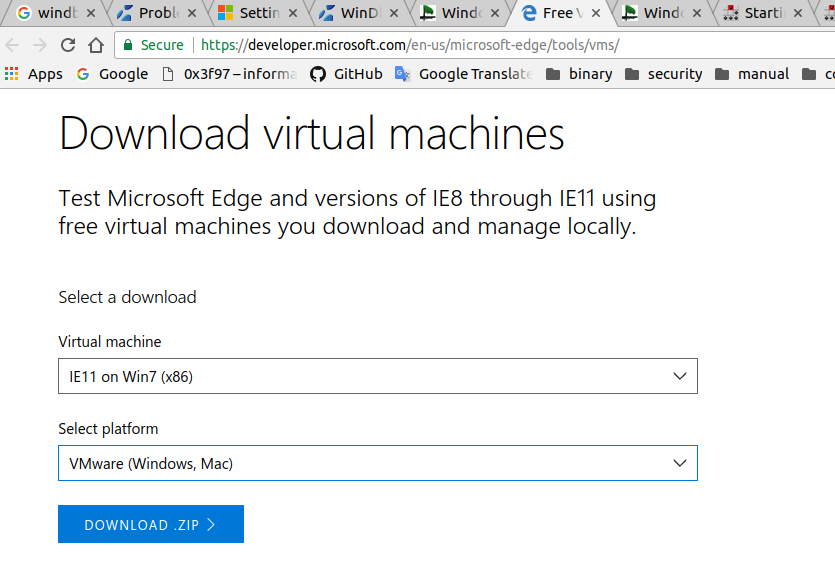
安装 Windows7 x86 的虚拟机,从微软官网下载 VM download page 将其作为 Debuger。
Setting up the Debugger
在 win7 的虚拟机里面安装好 Windows SDK
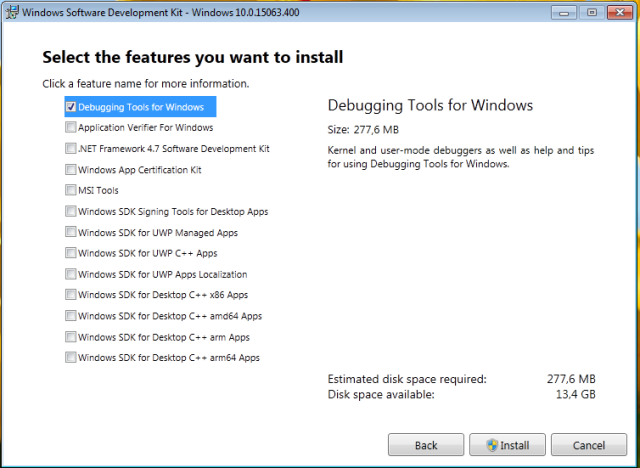
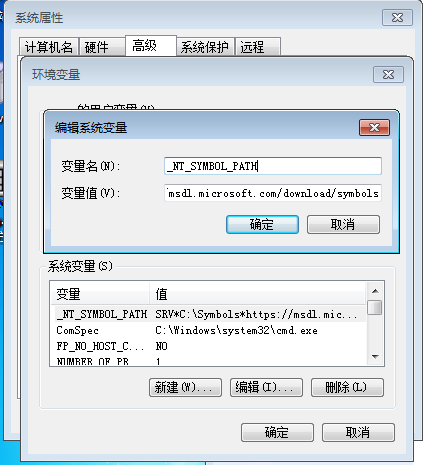
安装完后就可以使用 windbg 了,再添加一些 Symbols。添加系统环境变量:
Variable Name: _NT_SYMBOL_PATH
Variable Value: SRV*C:\Symbols*https://msdl.microsoft.com/download/symbols
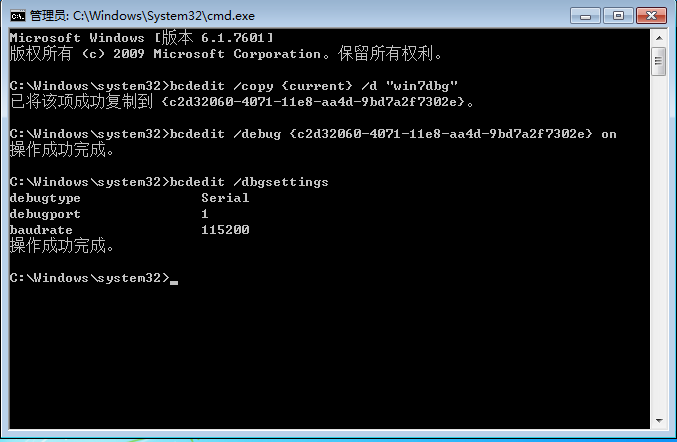
配置完成后启用调试模式,以管理员身份运行 cmd,执行以下命令:
bcdedit /copy {current} /d "win7dbg"
bcdedit /debug {c2d32060-4071-11e8-aa4d-9bd7a2f7302e} on
bcdedit /dbgsettings
Setting up the debugee
将 Debuger 关掉,点击 Manage -> Clone
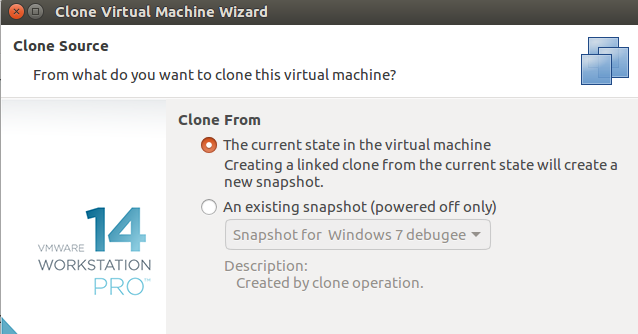
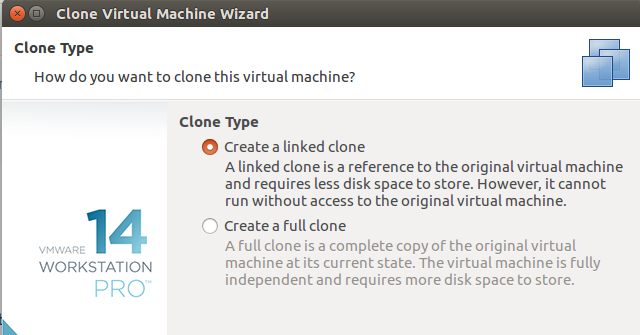
复制出来将其作为 Debugee。
Setting up the connection
现在配置它们的连接,使用 Serial Port,设置 Debuger 和 Debugee 具有相同的 pipe name,
使用 linux 作为本机需要设置 pipe name 为:
/tmp/dbg
如果使用 windows 作为本机则设置 pipe name 为:
\\.\pipe\wke_pipe
配置 Debuger:
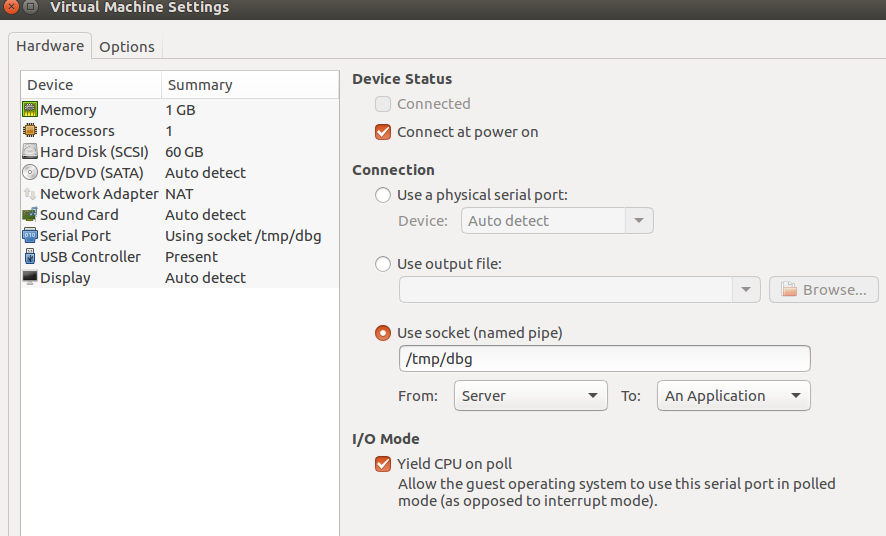
配置 Debugee 只需将 From: 值改为 client。
然后先打开 Debuger,选择没有 debug enable 的启动项:
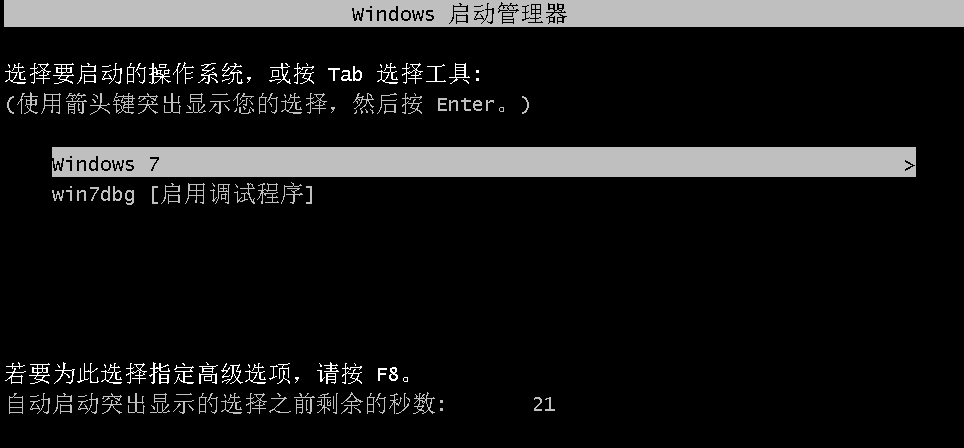
开启之后打开 windbg,选择 File -> kernel Debug
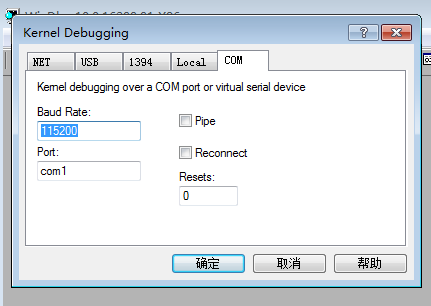
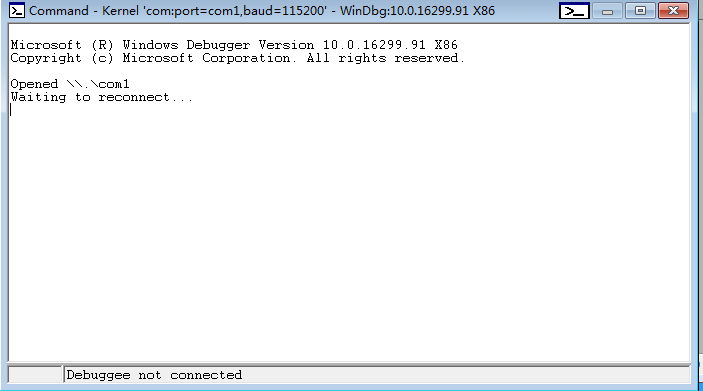
让其等待连接
继续打开 debugee,这次选择 debug enable 的启动项:
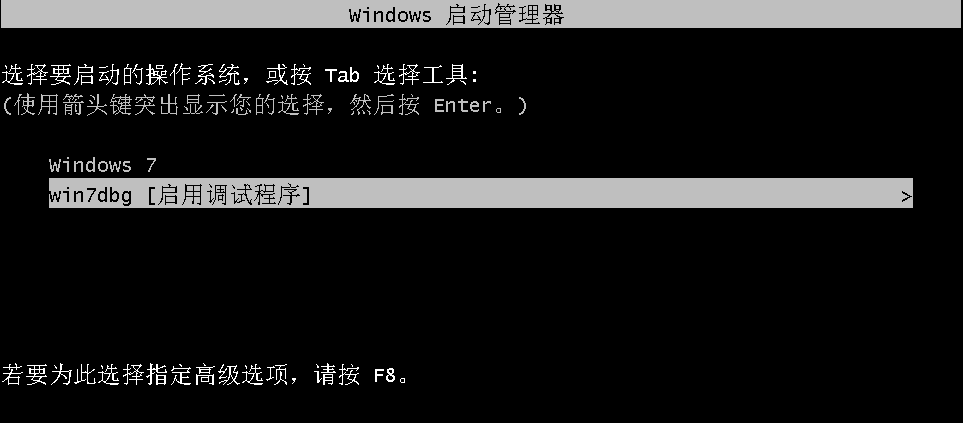
如果设置正确,接下来会连接上 windbg
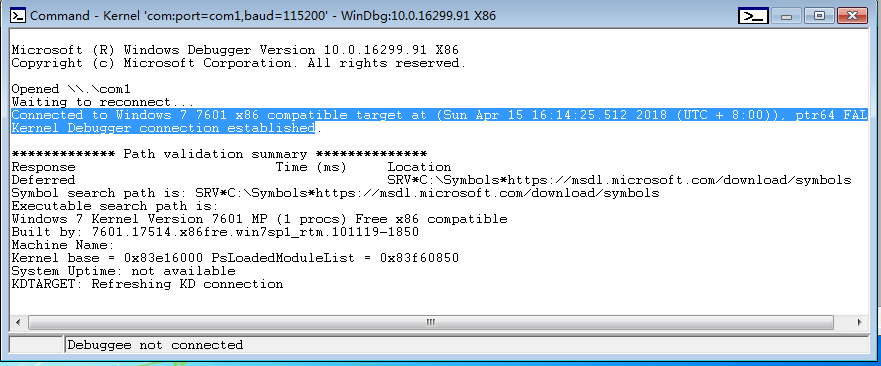
可以选择 break 按钮获取命令交互:

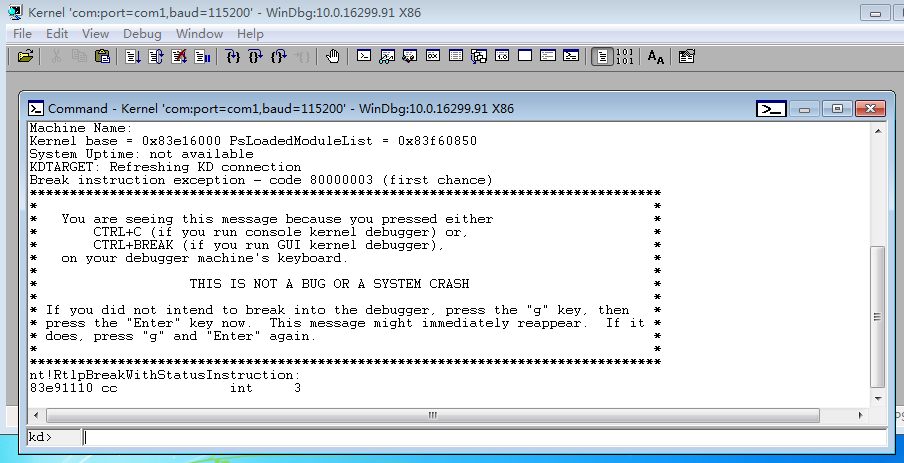
运行以下命令可以确认符号表是否被正确加载:
!sym noisy
.reload